
April KALFH #2: Deco Mug Mat
Oooh doggie I'm excited about today's project! I really enjoy brioche but haven't had a chance to play with it in quite some time. But the time has come and I got to work up this adorable mug mat in just hours! My fingers are itching to get some more brioche on my needles!
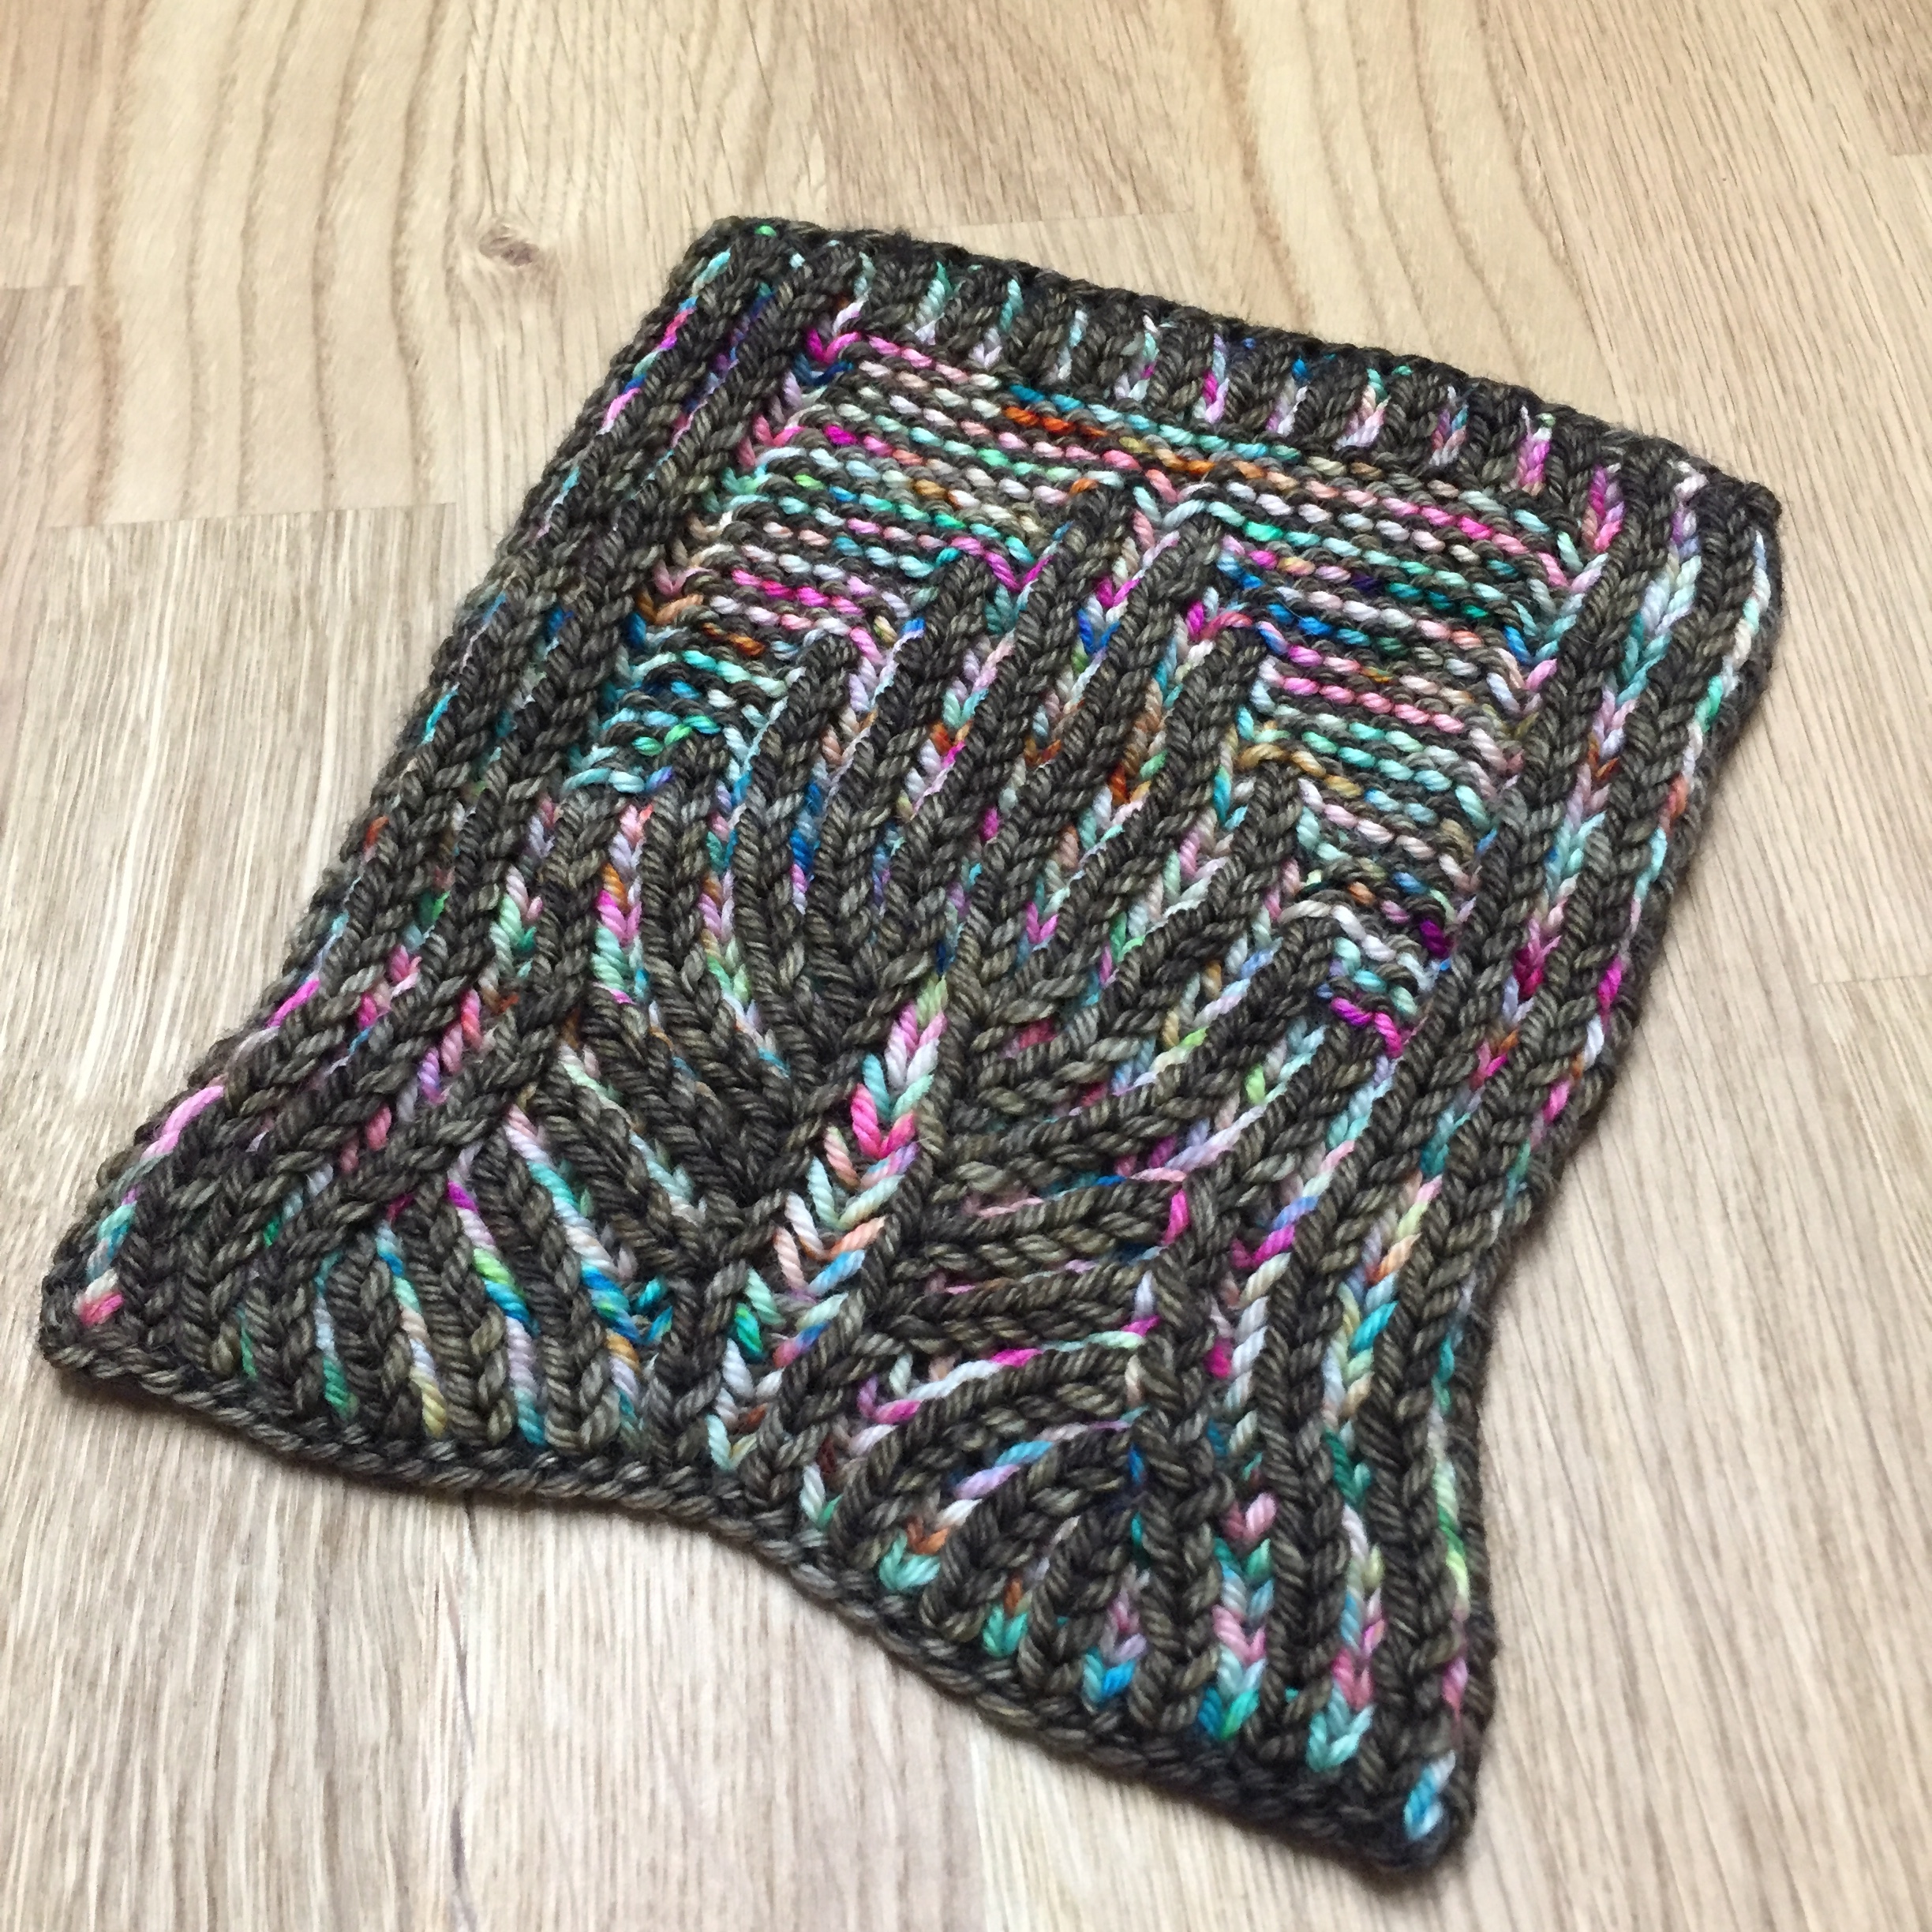
Deco Mug Mat by Lesley Anne Robinson
That's Brioche, Baby!
Brioche is lauded as a "scary" technique, or something that a noob knitter can't do. WRONG! (in my opinion). Sure, it's maybe not the first thing you should try when you pick up knitting needles for the first time, but like any skill, if you practice, you will overcome! And this lovely little mug mat is just the ticket for learning brioche!
I actually believe that 2-color brioche is easier to learn than one color because you can see what the columns are doing. When the RS is facing, your brk (brioche knit) stitches will look like V's, just like standard knitting (the brown yarn in the above photo), and your brp (brioche purl) stitches will look kind of like W's - or really wide V's with a purl bump in the middle (the variegated yarn in the above photo).
Basic Brioche Stitches:
- brk - brioche knit (read as: ‘bark’): knit the stitch together with its wrap.
- brp - brioche purl (read as: ‘burp’): purl the stitch together with its wrap.
- sl1yo - slip 1 with yarn in front, yarn over: this combination of actions is what creates the wrapped stitch, which is the basis of brioche.
- Sl1yo after a brk or knit stitch: bring working yarn to the front between the needles, slip next stitch purlwise, then move the working yarn over the RH needle and the slipped stitch to the back, as if to yarn over; the working yarn is now in position to brk (or knit) the next stitch.
- Sl1yo after a brp or purl stitch: leaving the working yarn in the front, slip next stitch purlwise, then move the working yarn over the RH needle and the slipped stitch and around to the front of the work between the needles, as if to yarn over; the working yarn is now in position to brp (or purl) the next stitch.
Video Support!
I have a slew of How to Brioche videos on YouTube. Please be kind. They were made a few years ago and were the first videos I ever made. I may have used the wrong word here or there but for the most part, you should find them quite helpful. Here is a full list of videos for each of the skills used in this project:
- How to 2-Color Brioche, Worked Flat: https://www.youtube.com/watch?v=pbpzAO6lFw8
- How to brLsl dec (brioche left slant decrease): https://www.youtube.com/watch?v=4Ro_N4NCUDQ
- How to brRsl dec (brioche right slant decrease): https://www.youtube.com/watch?v=5w3s_MYULtU
- How to brkyobrk (2 stitch increase): https://www.youtube.com/watch?v=AR_Lxfg12AY
Tips and Tricks for the project
Brioche in general
Brioche is simply a combination of slipped stitches and YO's worked simultaneously. The three tips I tell people are as follows:
- If you see an unwrapped stitch, give it a wrap.
- If you see a wrapped stitch, take away the wrap (by knitting or purling the stitch and it's wrap together).
- When working the slipped stitch and YO simultaneously, the working yarn should always be in the front. So If you're knitting, bring the working yarn to the front before slipping a stitch. If you're purling, lucky you, the working yarn is already in front!
The Cast On
This pattern begins with a Super Stretchy Slipknot cast-on. There is a link right in the pattern to video support which is awesome. I, however, chose to do a German Twisted Cast-On instead since I know my tension is loose enough. I recommend trying both techniques and choosing the one that suits you best.
The reason I chose the German Twisted is because I know that MY brioche tension is super floopy. Yep - floopy. It's just far looser than I like so the German Twisted, while stretchy, gives me a bit of control over that bottom edge by being a nice structured cast-on.
If you're unfamiliar with the German Twisted Cast on, here is a video tutorial to get you going: https://www.youtube.com/watch?v=-_FbiKdetFk
Needle Size
I also changed needle sizes. I know that my gauge in brioche is quite loose so I worked the project on a US 6 instead of a US 7.
Row 5 MS CC
Row 5 using the Counter Color (i.e.: the row that we work brp's) is the first time we encounter processing stitches after an increase. As you come to the 3 stitches created on the previous row, worked as brkyobrk, process these 3 sts as (sl1yo, p1, sl1yo). You will process brkyobrk's this way on all CC rows.
Weaving in those pesky ends!
Ugh... I LOATHE having to weave in ends, but it's all part of the knitting game, isn't it? But guess what? Weaving in ends on brioche is the EASIEST. For serious - I wish weaving in ends on all other knit fabrics was this easy.
I've got a quick video on weaving in ends so that your fabric will look tidy on each side. Just remember: weave in the CC with the RS facing; weave in the MC with the WS facing.
Video tutorial: https://www.youtube.com/watch?v=Ah3u0p6rdRg
Finishing
I wet block all of my brioche - I feel that it gives the project the best chance to smooth out an inconsistencies in the fabric. Just be aware that brioche, when wet, looks CA-RAZY! It stretches out a ton and you'll feel like your work is ruined. But fear not, my brioche-y friends. As the fabric dries and the yarn shrinks back up, your project will be bouncy and delightful. I soaked my mug mat, squeezed the water out (without wringing or twisting it) and laid it flat to dry - without pins! I feel that this gives the fabric the best chance of snugging back up to its original shape.
If you like to pin things out, go for it! Lesley has a wonderful pictorial in the pattern to show you how to pin out the project. And that's why we love Lesley!
Keep in touch!
Thanks for knitting along with us on this project! If you're on social media, feel free to tag #unapologeticknitter (or use @notsorryknitter on IG) so I can see your amazing creations! I can't wait to KALFH with you!